Showing posts with label Christmas. Show all posts

Thursday, January 10, 2013

Simply B Facebook Fan Group Challenge


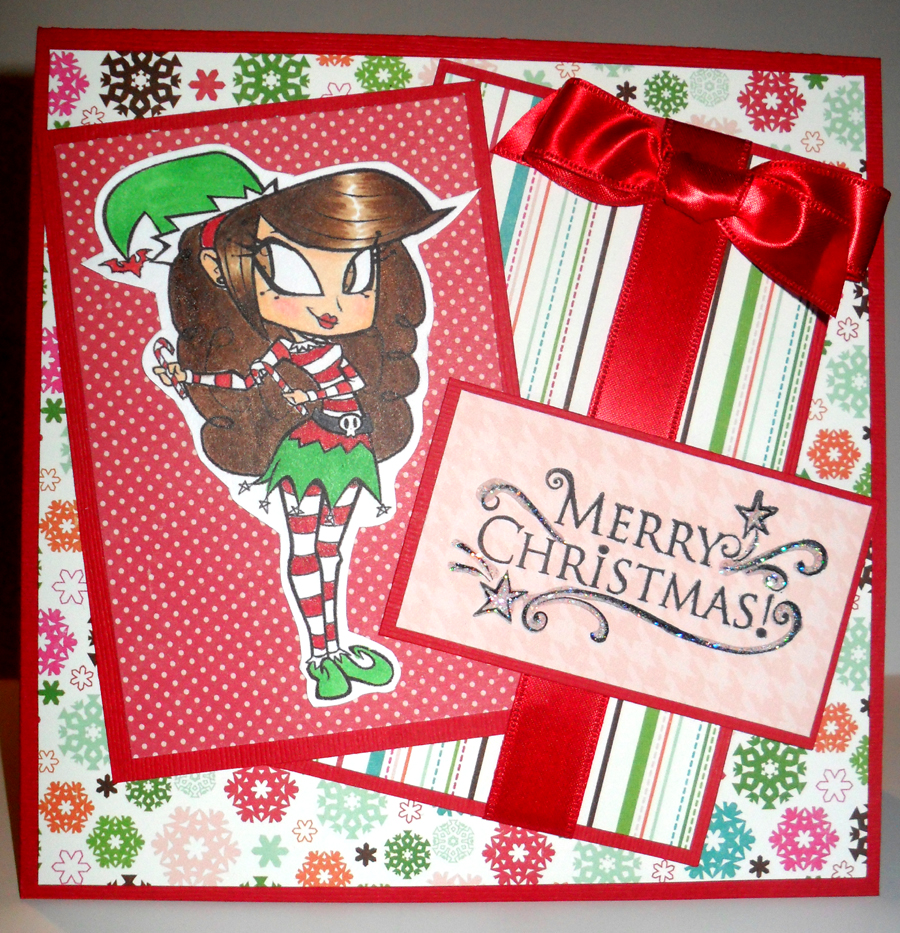
Here is the card I made for last month's challenge over at the Simply B Facebook Fan Group.  We were given this festive image of London to use on our project.  The challenge was to use Christmas colors.  I inked her up with Copics and stuck with the traditional red and green Christmas combo for her outfit.  Right now, I still struggle with coloring curly hair, but I plan on changing that this year with lots of practice!  You can't tell in the picture, but I added some sparkle to the sentiment with some Stickles.

Well, that's it for my second share of the year.  One of my big goals for this year is to get a lot more cards done, and I already have four more done and ready to share with you all.  See you soon!

Saturday, December 15, 2012

Christmas Card Swap Blog Hop


Welcome to the Christmas Card Swap Blog Hop! You should have arrived here from Sandra's blog.  


The best way to brighten a person's day is to send them a card, and the holidays give everyone the perfect excuse to do that. When you add talent to the mix, you have the perfect hand-made holiday card to brighten anyone's day.

That brings us to today's hop. We have gathered some of the most talented card makers around to bring holiday joy to each other while showing off their talents.

Today, some of these wonderful ladies will be showing off the cards they made. We hope you have fun hopping and hope you get inspired to send out cards if you haven't already!

If you've just joined the hop, please hop on over to Lorby's World where you can find all the details on the blog hop candy.

Now, on to my project:


For me, the key to making multiple cards is sticking with a fairly simple design and an image that is easy to work with.  In this case, I turned to a pre-colored digi from The Paper Shelter.  That's right -- PRE-COLORED!!!  All I had to was print and then cut out with my Nesties.  I used a snowflake embossing folder and some cute striped paper from Doodlebug.  The "jingle" sentiment is a stamp from the Perfect Ending stamp set by Stampin' Up!  How cute is that?!  

Thank you for hopping today and please continue on to Shawnee's blog and check out her beautiful card! Below is the complete blog hop lineup in case you get lost along the way.

  1. Jearise ~ http://lorbysworld.blogspot.com
  2. Melissa Pinter ~ http://pinkpolkadotscrapping.blogspot.com
  3. Shelly Lynn ~  http://kccroppers.blogspot.com
  4. Sandra Merritt ~ http://merritt-vergaray-connection.blogspot.com/ 
  5. Dena Jones ~ http://missdjones.blogspot.com/
  6. Shawnee ~ http://quiverofangels.blogspot.com
  7. Beth ~ http://motherdaughterdesigns.blogspot.com
  8. Tonya ~ http://www.creativeaddictiontopaper.blogspot.com/
  9. Ashley W ~ http://marinewifesscrappinlife.blogspot.com
  10. Dana T ~ http://danascraftycorner.blogspot.com
  11. Sharon ~ http://simplysweetbysharon.blogspot.com/

Friday, December 7, 2012

Warm And Cozy Winter Blog Hop


It's another blog hop!  Today, it's the Warm And Cozy Winter Blog Hop hosted by Lisa at Honeybearz Designs.  You should have arrived here from her blog.  If not, you'll want to be sure to start there to get all the details on today's hop, including the blog candy.

I love gift bags and always have a stash on hand.  The plain Kraft ones are always handy to have so you can decorate them according to the occasion.  That's exactly what I did for a cocoa gift set.  It's a super cute mug and two packets of Salted Caramel Hot Cocoa.  YUM!


A while back, I cut a bunch of Gingerbread men from a Sizzix die and embellished them for a swap.  I made extras to have on hand, and it sure helped to make this project go quickly.  I started by matting some cute patterned paper by Doodlebug.  I then glued to a plain Kraft gift bag.

Next, I added the gingerbread man using dimensional foam stickers.  My teenager wanted the words "for you" on the front of the bag, so I took white alpha stickers by American Crafts, stuck them on brown cardstock, and then fussy cut each letter before gluing to the bag.


Sheer red ribbon, Christmas twine, and some red jingle bells hot glued to the bow were the finishing touch.  I love pretty packaging, and I hope the recipient of this cocoa set loves it, too!

Thanks for stopping by.  Please hop on over to Ashley's blog next to check out her cute project!  Below is the complete lineup in case you lose your way:


Dena ~ http://missdjones.blogspot.com/  (YOU ARE HERE)


Wednesday, December 14, 2011

Friendship's Garden Challenge Blog: Anything Goes Christmas or New Year Theme Challenge!

(click on image to enlarge)

This week's challenge over at Friendship's Garden Challenge Blog is:  Anything Goes with a Christmas, New Year, or Winter theme!  For this challenge, I made a 6 x 6 card using patterned paper from Bo Bunny's Blitzen line.  I love the vintage-y feel of this paper.  I decided to try something different and incorporate blue and green in this card, using the patterned paper as inspiration.  Often, when I buy patterned paper, I try to find the exact match in cardstock while I'm in the store.  It's just so much easier to do it that way, even if I don't plan to use the patterned paper on a project right away.  I just store the cardstock with the patterned paper for later use.

I knew that I wanted a large vintage Santa image to use on this card, one that was more of a bust or headshot.  I found the perfect one HERE.  There were a variety of Santa images to choose from.  I added ribbon, twine, and a charm I got from Etsy.  The final touches were the sentiments.  The North Pole ticket sentiment came from an awesome site I recently discovered.  She has a lot of awesome free printable sets, including ticket sets!  Check out the site HERE.  I used the North Pole ticket from one of the Christmas ticket sets.  I also took one that said "Merry Christmas", but cut out just the words instead of using the entire ticket image.

As you can see, you can put a card together using printables for the image and sentiments -- and without paying for any of them!  Hope you enjoyed your visit today.  Don't forget to check out Challenge 6 over at Friendship's Garden Challenge Blog.  Have a great day!

Friday, December 9, 2011

Christmas Cards & Cookies Blog Hop: Weekend Two

(click on image to enlarge)

Welcome to Round Two of the Christmas Cards & Cookies Blog Hop!  There was so much response to the Christmas Cards & Cookies Blog Hop that it had to be split between two weekends.  Round One was held last weekend.  Round Two is this weekend, beginning on Saturday, Dec. 10th, through Sunday, Dec. 11th.  We have a talented group of women who love papercrafting and baking.  Each of them is sharing a recipe for a yummy Christmas treat along with a Christmas card or tag.  Hopefully, you’ll pick up some great ideas for your own Christmas gift giving this season.  So, grab a cup of coffee, sit back, and enjoy!

In Round One of this blog hop held last weekend, I featured a cookie recipe.  It's a long-time favorite called Rolo Cookies.  If you'd like to see that post, CLICK HERE.


For this weekend's project, I am featuring The World's Easiest Fudge recipe.  It really is super easy!  Now, I know a lot of people use the recipe on the back of the marshmallow fluff jar, but I don't always have a jar of that stuff on hand.  This recipe calls for only two ingredients!  Here is the recipe:

World's Easiest Fudge

Ingredients:

one bag of chocolate chips
one can of prepared frosting

Pour both into a microwavable bowl.  Heat in microwave in 30-second intervals.  Heat and stir until melted.  Pour into wax or foil-lined pan and cool.  

*Optional:  Mix in nuts, raisins, crumbled cookies, etc ... to kick things up!

(yummy fudge)


(my daughter showing off some of the fudge she made all by herself)

This fudge is really rich.  You don't need to eat a lot of it to satisfy a sweet tooth!

Now, for my card shown at the very top of this post:  I made a 4 x 4 note card to give with a package or tin of fudge.  I like doing these little notecards because you can keep them pretty simple.  The word "Christmas" on the front is actually a sticker that I matted.  I added some ribbon, twine, and a dimensional sticker.  The green polka dot paper is actually much brighter IRL.  I wish it photographed better!  *sigh*  All in all, making this card was pretty easy and quick.  One tip I'd like to pass on is that matting really helps to add pizzazz to a card!

Well, I hope you try out -- and enjoy -- this recipe!  If you have any questions, please feel free to leave them in a comment along with an email address so I can contact you.

Thanks so much for stopping by! Please be sure to visit Theresa's blog next to see what she has to share with you!  

Below is the complete lineup should you get lost. 
Friday, December 2, 2011

Christmas Cards & Cookies Blog Hop: Weekend One


Welcome to Round One of the Christmas Cards & Cookies Blog Hop!  There was so much response to the Christmas Cards & Cookies Blog Hop that it had to be split between two weekends. This is Round One and begins Saturday, Dec. 3rd, continuing through Sunday, Dec. 4th. Round Two will be held next weekend. We have a talented group of women who love papercrafting and baking. Each of them is sharing a recipe for a yummy Christmas treat along with a Christmas card or tag. Hopefully, you’ll pick up some great ideas for your own Christmas gift giving this season. So, grab a cup of coffee, sit back, and enjoy!

I made a Christmas card using some super cute Doodlebug paper!  The snowman is from a diecut swap I was in last year.  I made this diecut with a Sizzix die.  It's one of my faves!  I filled in the hearts with red stickles and used a white puffy paint pen for the white wavy accents on the arms and legs.  The scarf was some fancy ribbon I had in my stash.  The scarf and ribbon are actually red IRL (in real life).  Unfortunately, the colors don't show up so well here.  Last, I added faux stitching with a pen.  I made a few of these last year and kept them to use this year.  So glad that I did!

Now, for my recipe:


ROLO COOKIES

Ingredients: 

1 box devil's food cake mix
2 eggs
1/3 c oil
Rolo candies

Mix the first 3 ingredients.  Take a small portion, just enough to wrap around a Rolo candy.  Shape into a ball.  Bake at 350 degrees on greased cookie sheet for approximately 7-9 minutes.  Dust with powdered sugar (optional).

That's it!  Easy peasy!  These are always a crowd pleaser.  The caramel gets nice and gooey when the cookies are fresh out of the oven.  YUM!  If you have any questions, feel free to post a comment with your email address, and I'll get back to you.  Don't forget to return next week for Round Two of the Christmas Cards and Cookies Blog Hop.  

Thanks for stopping by!  Please be sure to visit Robin's blog next to see what she has to share with you!

Below is the complete blog hop lineup:  

Wednesday, November 30, 2011

Friendship's Garden Challenge Blog: Pinterest Inspiration


Hello, bloggers!  How do you like the new look here?  LOL!  I finally changed the template and decided to go with a Christmas theme.  I have to say that I really like it!  It's so cute and festive!  Well, I hope you all had a great Thanksgiving holiday.  As usual, I ate way too much.  OINK!  I did all the baking and cooking, so I was pretty exhausted after.  No venturing out to the mall on Black Friday for me, BUT my boyfriend did buy me an early Christmas present online.  I'm getting a Silhouette Cameo!!! WOO-HOO!!!!  It won't ship until early or mid-December, so that means it will be a few weeks before I can play with my new toy.  BOO HOO!  I can't wait! *pout*

Well, enough pouting and on to the latest challenge at Friendship's Garden Challenge Blog..  This time, it's a color inspiration challenge from a Pinterest post.  Here are the colors :


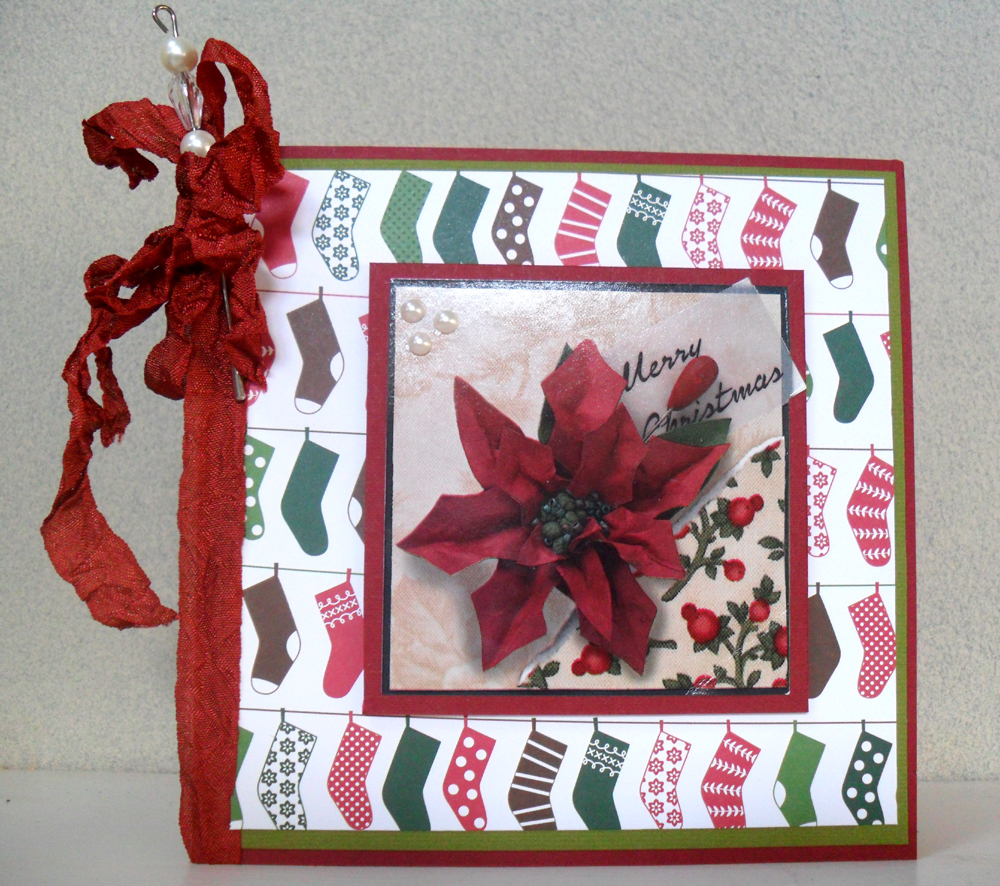
I made a quick card using a diecut I had in my stash as the focal point.  I added some seam binding and a vintage stick pin from SU!  I finished off the card with a few flat pearls.

I'm going to be posting more projects in the next few weeks, so please be sure to stop by again.  I'm sponsoring a blog hop this weekend called "Christmas Cards and Cookies".  There will be 15+ talented ladies sharing Christmas cards and tags along with recipes for yummy Christmas goodies.  So, if you're looking for some ideas for goodies you can bake for your friends and family, be sure to stop by.

Last, I want to share that the turkey card I posted a few weeks ago was selected as one to be showcased over at Die Cuttin Divas.  I was so flattered that they chose my card!


Well, thanks for stopping by.  Don't forget to stop by and enter the latest challenge over at Friendship's Garden Challenge Blog.

Wednesday, November 9, 2011

Sweet Stamping Treats Sketch Challenge


(close-up of the Stickles)

Happy Wednesday!  I have a total of THREE posts today!  WOW!  This is a card I created for the Sweet Stamping Treats Sketch Challenge.  I used one of the November releases called Penguins on Ice.  It's my favorite of this month's release! :)  I colored the image with Copics and then added Stickles to get a sparkly effect.  It reminds me of those Christmas cards that look like they have snow on them.  I LOVE those!!! LOL!  I wanted to add a little more to my card, so I added a sticker sentiment at the bottom and a button with some red and white twine.  The paper is Echo Park's Jolly Holly Christmas. If you're interested in purchasing this digi stamp, please visit Sweet Stamping Treats and be sure to check out all of their entire collection!  Aloha!